One table. A second way to use it.
Continue your lesson 2 file
Continue your existing practice file to build along, or download the finished lesson 3 example below to compare.
By the end, you will have a Contact Entry layout showing FirstName, LastName and Email from Contacts. Your original layout and records will still be there.
- Finish lesson 2’s practice: your file should contain Linh, Alex Rivera, Alex Morgan and Sam Patel, with Sam’s email set to sam.patel@example.com.
- Finish any record edit, close the file in FileMaker, and make a Finder backup with a clear name such as My Contacts — before lesson 3.fmp12. Reopen your working file.
- Write down the current record count. We will compare it after creating the layout.
I need a starting point
Download the lesson 2 example, extract it into a separate training folder, and keep your existing work. That example is version 0.1.3, has three fictional contacts and no Contact Entry layout. Complete lesson 2’s Sam activity before starting here. The lesson 2 starting ZIP is earlier: it has only default fields and one empty record.
Use the built-in theme assigned to the new layout. No Filesoft theme purchase is needed. This lesson designs for FileMaker Pro on a Mac; Go and WebDirect need their own layout review. Use the existing toolbar for record actions; creating a custom button comes in lesson 5.
Mode is the task. View is the presentation.
Browse mode
Read and edit contact values, create records and move between them.
Layout mode
Place field objects, edit labels and arrange the screen people will use.
Choose a mode from the View menu. Within Browse mode, Form View shows one record at a time and Table View shows rows and columns. Form View is not another mode.
A field definition belongs to the table. A field object displays that field on a layout. A label tells the reader what the object means. For example, the label First name can sit beside an object displaying FirstName.
Moving the Email object should change its position. Typing into Email in Browse mode should change the current contact’s value. Creating this layout should add no contact records.
STEP 1
Create Contact Entry.
- Choose View → Layout Mode, then click New Layout/Report in the status toolbar.
- Set Show records from to Contacts. Name the layout Contact Entry.
- Choose Computer, then Form, and click Finish.
- Check that Contact Entry is selected in the Layout menu. Keep the built-in theme assigned to it.
The new layout starts in Layout mode. Its blank space is a place for objects; it does not mean your contacts have disappeared. Keep the original layout for the comparison later.
Contact Entry already exists
Select it instead of making another layout with the same name. Check its table in Layouts → Layout Setup: Show records from should be Contacts. If you are looking at unrelated work, return to your separate training file.
STEP 2
Place three fields with clear labels.
- In Layout mode, drag the Field tool from the status toolbar into the layout’s Body area. In Specify Field, choose FirstName from Contacts, select Create label, and confirm.
- Repeat for LastName and Email, placing each below the previous field. Add each field once.
- Edit the label text to read First name, Last name and Email. Use the Text tool to select the label text. Leave the database field names unchanged.
Keep the primary key and creation/modification fields in the table. They do not need objects on this entry layout.
I am unsure which field an object displays
In Layout mode, double-click the field object to inspect Specify Field. Confirm FirstName, LastName or Email as appropriate. Changing a label alone does not reconnect its neighboring field object.
STEP 3
Make the form easy to scan.
Use one vertical column of fields, with each label to its left. Give Email enough width to display sam.patel@example.com without clipping. Keep a clear gap between each label and its field.
- With the selection tool, select a field object and drag its handles to resize it. Move its label separately when needed.
- Shift-click the three field objects. In the Inspector’s Position tab, use the Arrange & Align controls to align their left edges and distribute vertical spacing.
- Select the three labels and align their left edges separately. Check that each label still sits beside the correct field.
- Choose View → Browse Mode. Save the layout when prompted. Use View → View as Form if necessary.
- Move through the contacts with the record navigation controls. Check each full name and email. Return to Layout mode to adjust anything clipped, then save and check again.
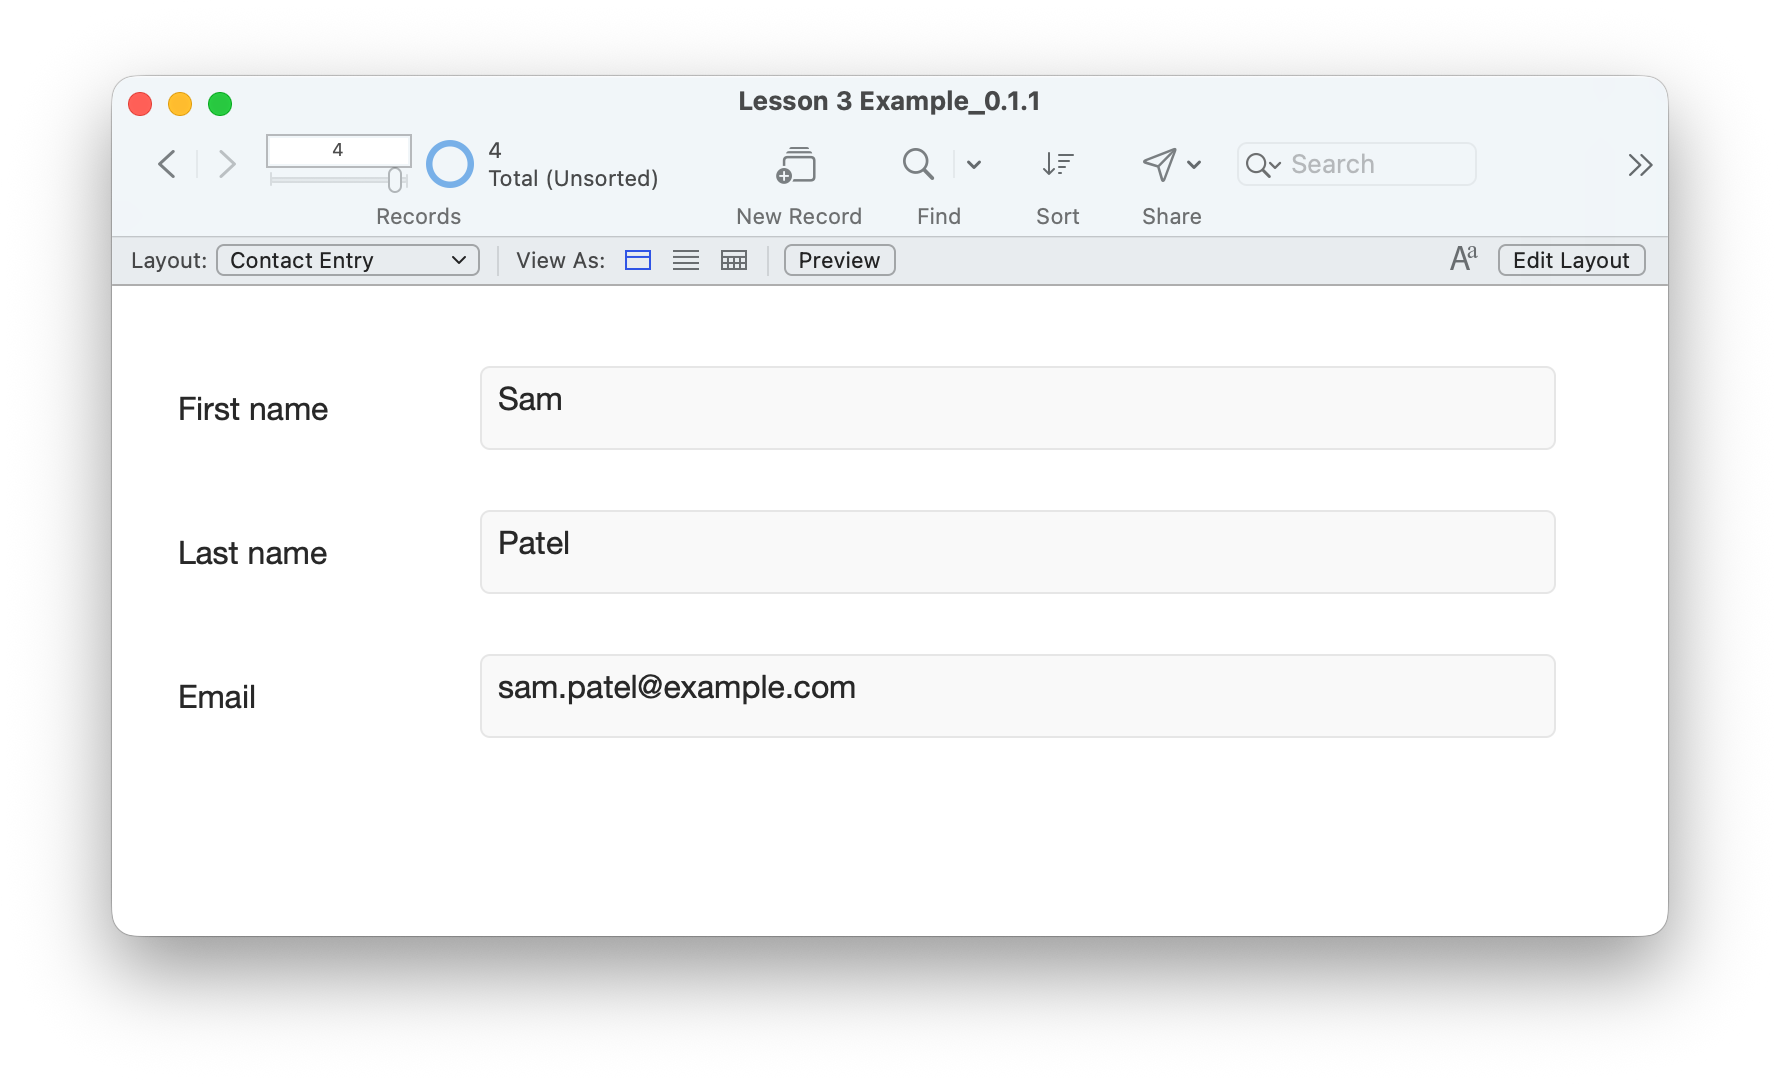
Judge the result at the window size you expect to use. A tidy arrangement is useful only if the actual values fit.
Form View shows the current contact. Compare the record count with your starting count and navigate to the other contacts. Do not add replacement records just because only one person is visible.
STEP 4
Make Tab follow the form.
- In Layout mode on Contact Entry, choose Layouts → Set Tab Order.
- Click Clear All, then click the arrows beside FirstName, LastName and Email in that order. Check the numbers are 1, 2 and 3, then click OK.
- Return to Browse mode and save layout changes if prompted. Click First name, press Tab to reach Last name, then press Tab again to reach Email. Use Shift–Tab to go back.
Clear All in this dialog clears the keyboard order, not field values. Test the order after moving objects; their positions alone do not prove the keyboard path is right.
YOUR TURN / ABOUT FIVE MINUTES
Prove that the data is shared.
- On Contact Entry in Browse mode, navigate to Sam Patel. Confirm the email starts as sam.patel@example.com.
- Change it to sam.training@example.com and click outside the field to finish editing.
- Choose your original layout from the Layout menu, use Table View, and locate Sam. Confirm the same updated email appears there. Identify Sam by name and email; row position alone is not an identity.
- Restore Sam’s email to sam.patel@example.com in the original layout. Finish the edit, return to Contact Entry and locate Sam again. Confirm the restored value.
- In Layout mode, move Email and its label a little farther down. Save and return to Browse mode. Check that the email value and record count stayed the same.
- Close and reopen your file. Select Contact Entry and check the layout, email and Tab order.
Compare your result
You have two layouts showing the same Contacts data. Sam’s edit appeared in both, and the original email is restored. Moving an object changed the presentation. The four contacts, field definitions and generated IDs were preserved; no new table was needed.
If a value differs, check the selected layout, its Contacts table, the current person and the field binding before typing again. Keep your attempt for review.
Example 0.1.1 includes the finished Contact Entry layout, original Contacts layout, four fictional contacts and a Read Me. Sam’s email is sam.patel@example.com. This is a completed example; continue your own lesson 2 file to practise building the layout. The example retains the inherited lesson 2 developer automation privileges.
A QUICK REVIEW
Check your understanding.
Choose one answer for each question. Read the explanations and retry any you miss.
Answers stay in this page’s memory. No account is needed. We count quiz submissions without collecting answers or scores.
Now find the people you need.
You have a contact-entry form and an original view for comparison. Keep this working file: lesson 4 will introduce Find mode, found sets, sorting and showing all records.
Continue to lesson 4 ↗. Continue with the find-and-sort walkthrough.
Return to the course outline ↗Further reading
Steps checked against current Claris Help on 5 October 2026.