A small file you can explain.
In lesson 1, you planned a Contacts table. Now you’ll build it. At the end, you should be able to point to a field definition, a stored value and a record—and explain how they differ.
Your practice files
The lesson now includes a starting file, a three-contact example and a native screenshot. Use your own copy for practice. These examples were prepared in FileMaker Pro 26 on macOS.
- Use FileMaker Pro 26 on a Mac. A FileMaker license or trial is required separately.
- Read lesson 1 first if tables, records or fields are unfamiliar.
- Create a new practice file. Do not change a file you use for work.
- Use the fictional contacts below. No customer information is needed.
Keep the built-in theme that FileMaker gives the new file. No Filesoft theme, add-on or other purchase is needed for this exercise.
FIRST / DECIDE WHAT BELONGS TO A CONTACT
Names and email are text.
We’ll add three fields. Use these names exactly so later lessons are easy to follow. A field name is a label for a kind of information; Linh and Nguyen are values that belong in two of those fields.
| Field | Type | Example value |
|---|---|---|
| FirstName | Text | Linh |
| LastName | Text | Nguyen |
| Text | linh@example.com |
Text is appropriate for names and email addresses. A Number field is useful for quantities you calculate with; a Date field is useful for dates. An email address is neither.
Choosing Text does not make Email a mail-sending button or check that an address exists. For now, it simply stores what you type.
What happened to Contact ID from lesson 1?
Our earlier C001-style IDs made the illustration easy to read. In the native file, we’ll use FileMaker’s default primary key instead. It is a technical identifier, not a name or a row number. You do not type C001 into it.
FileMaker can add default fields to a new table, including a primary key and creation/modification details. We’ll keep those fields and their options unchanged. The three fields above are added alongside them, so the database will contain more than the four conceptual fields shown in lesson 1.
STEP 1
Create a separate practice file.
- Make a folder called Filesoft Training in Documents.
- In FileMaker Pro, choose File → Create New, choose Blank, then click Create.
- Name the file My Contacts and save it in your training folder. FileMaker uses the .fmp12 extension.
- In the Manage Database dialog, open the Tables tab. Select the initial table, rename it Contacts, and click Change.
- Open the Fields tab and check that Contacts is the selected table.
The file is called My Contacts. The table inside it is called Contacts. They serve different purposes, so their names do not have to match.
I don’t see Manage Database
Choose File → Manage → Database. Make sure you are in your new practice file. If your current file has custom menus or restricted access, stop and return to the blank file rather than changing that file’s settings.
STEP 2
Add three fields. Keep the default ID.
Look through the default fields first. Keep the primary key and the creation/modification fields. The primary key should be generated automatically for each new record; leave its existing auto-entry options in place.
If the default primary key is missing, stop here. Your FileMaker default-field settings may differ. The starting file below provides the default fields; do not invent IDs or use names as a replacement.
- In the Fields tab, enter FirstName in Field Name, choose Text, then click Create.
- Repeat for LastName and Email, both Text.
- Check that each new field appears once and has the right type.
- Click OK to close Manage Database.
You have changed the structure, but you have not entered any contacts yet. A field definition describes the space available in every record.
I entered the wrong field name
Return to Manage Database, select that field, edit its name and click Change. Do not create another field just to fix a spelling mistake.
I cannot see the fields on the screen
A field can exist in the table without being displayed. For this lesson, choose View → View as Table and use Modify to include FirstName, LastName and Email. Review the selected table and fields before continuing. Layout design comes in lesson 3.
STEP 3
Give each person a record.
Choose View → Browse Mode. Use View → View as Table for a compact list. Include the three contact fields through Modify if needed. Leave system fields alone.
- Check the record count. If the file has no records, choose Records → New Record. If it already has one empty record, use that record.
- Enter Linh in FirstName, Nguyen in LastName and linh@example.com in Email. Click outside the fields to finish the entry.
- Choose New Record for Alex Rivera, then again for Alex Morgan. Enter the values below.
- Confirm that you have three records, not three sets of fields.
| FirstName | LastName | |
|---|---|---|
| Linh | Nguyen | linh@example.com |
| Alex | Rivera | alex.r@example.com |
| Alex | Morgan | alex.m@example.com |
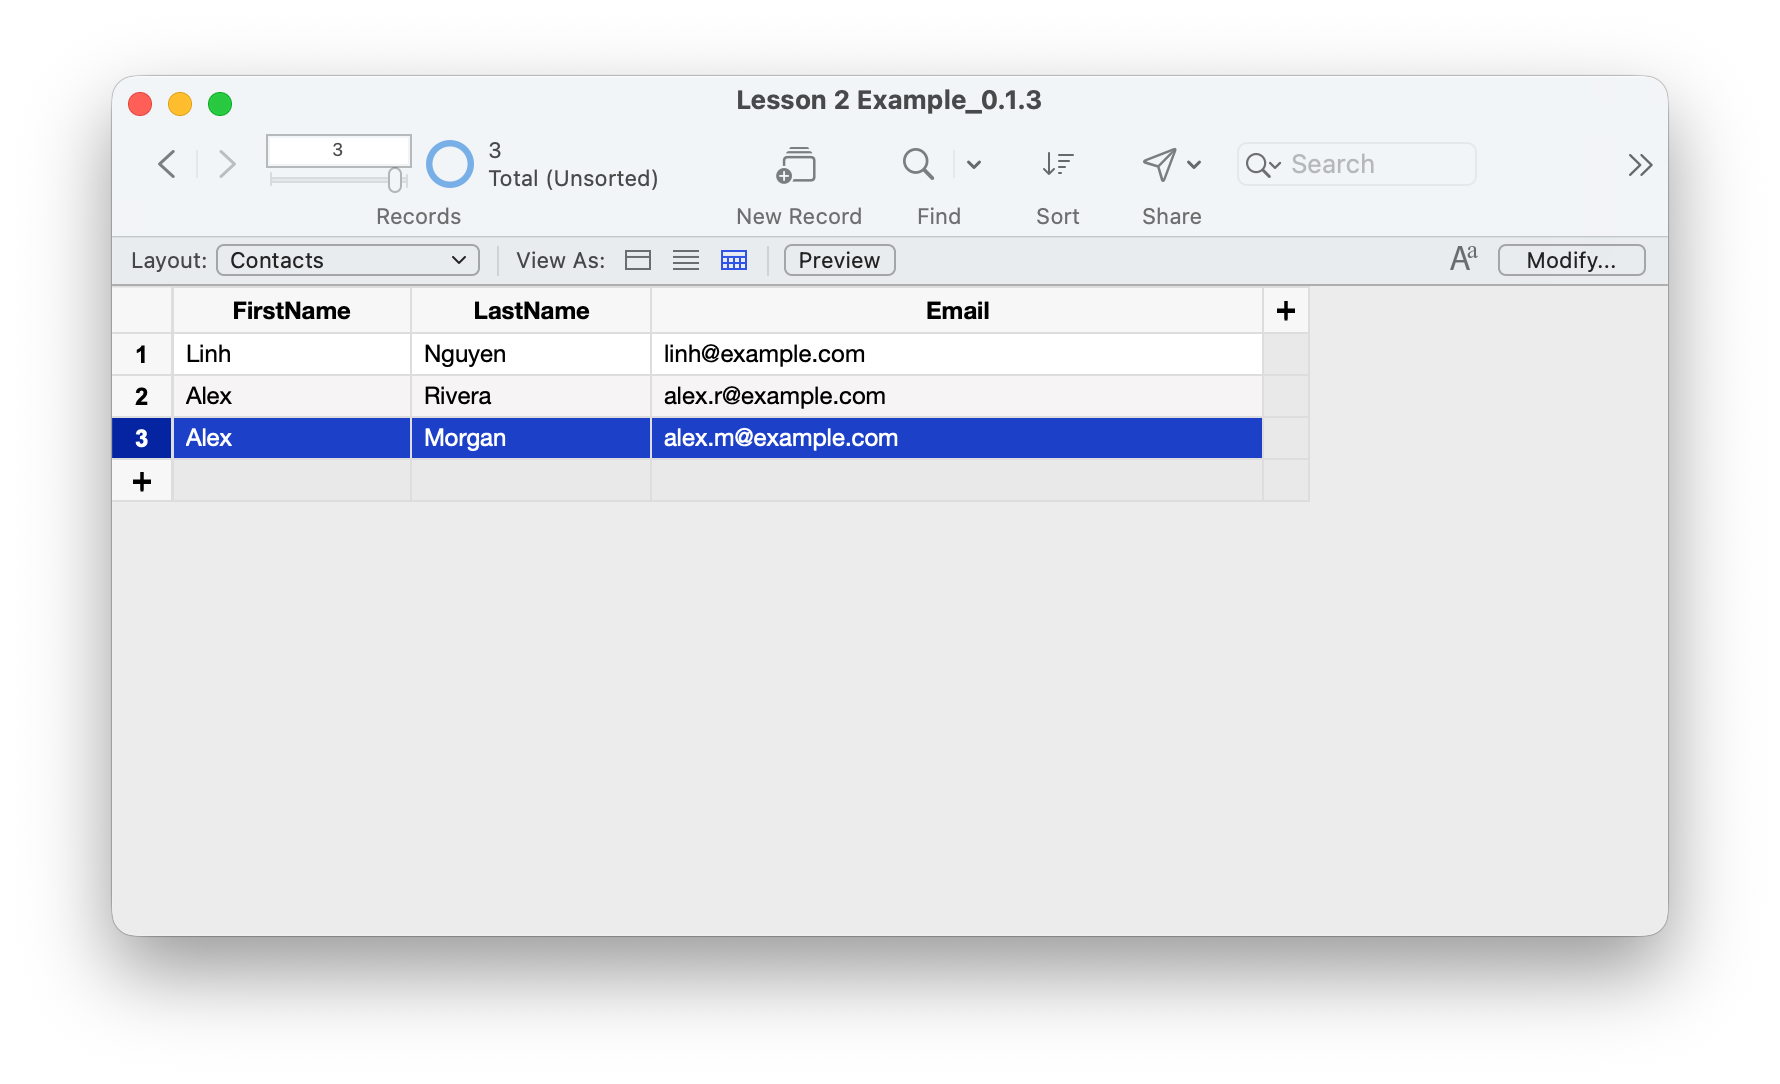
The two Alex records are different people. A name is useful for reading; the primary key is useful for identifying a record. Their generated IDs should differ even though their first names match.
Use Modify to display the primary key column temporarily. Check that the three records have different, non-empty IDs. Do not edit them. You can hide the column again afterward.
FileMaker saves changes as you work. Finish editing a record before moving on. Before making a Finder backup of this local practice file, close it in FileMaker, then copy the closed file to a clearly named backup folder.
YOUR TURN / ABOUT FIVE MINUTES
Add Sam without changing the structure.
- Add a fourth record for Sam Patel, with sam@example.com.
- Check that Sam has an automatically generated ID.
- Change Sam’s email to sam.patel@example.com and finish editing. Check that Sam’s ID stayed the same.
- Close and reopen your file. Confirm that the four contacts are still there.
- Explain why you used New Record instead of adding another FirstName field.
Compare your result
You should have four contact records and the same field definitions as before. Sam’s email changed, but Sam’s ID did not. The two Alex records remain separate. Reopening the file should show the values you entered.
If something differs, inspect the record count and field names first. Do not delete fields or overwrite another file to start again; keep your practice attempt so you can see what happened.
Starting file: Contacts is already named, with the five default fields and one empty record; continue at Step 2. Example: all eight fields and the three fictional contacts, ready to compare with your work. Both ZIPs include a Read Me. These are practice files, not secured production apps. The example retains the developer automation permissions.
A QUICK REVIEW
Check your understanding.
Choose an answer for each question. Read the explanations and try again whenever you want.
Your answers and scores stay in this page’s memory. We count fully answered quiz submissions without receiving your answers or score.
First make it work. Then make it clearer.
Your first contact file has a structure you understand and records you can edit. In lesson 3, we’ll arrange a simple entry layout and explore Browse mode versus Layout mode.
Keep your working file and continue to lesson 3 ↗. Continue with the layout walkthrough.
Return to the course outline ↗Further reading
File creation and field concepts checked against Claris Help. Use the practice files and screenshot to compare with your own work.