Build on your contact book.
Start with your completed Course 1 file: Contacts and Notes, the relationship between them, and the Contact Entry and Contact Notes layouts. Close it, make a backup, then open a working copy named Course 2 Working.fmp12.
The starting download is a copy of the Course 1 example, including its fictional contacts and a practice note. The completed example already has this lesson’s new field, list, rules and Contact Details layout. Its new status values are blank for you to classify.
Keep your own work separate from the example. These are local learning files with editable design access.
Your outcome
A Contact Details form with a required first name, an optional Active/Inactive status menu, and helpful validation messages. Existing contact identities and notes remain intact.
Decide what the app really needs.
For this exercise, every contact needs a first name. Last name and email remain optional. This is a teaching choice, not a universal rule for people’s names. Two contacts may share the same name; keep PrimaryKey as the unique identifier.
ContactStatus describes the contact: Active or Inactive. Leave it blank when you have not classified the contact yet. It is separate from a follow-up task’s completion status, which we’ll introduce later.
A value list offers consistent choices. A field validation rule checks entered data. A menu on one layout does not replace a rule on the field.
1. Require a first name.
- Choose File → Manage → Database. On the Fields tab, select the Contacts table.
- Double-click FirstName and open the Validation tab.
- Keep Only during data entry selected. Clear Allow user to override during data entry.
- Select Not empty. Leave Unique value off.
- Select Display custom message if validation fails. In Specify Calculation, enter the quoted text below, then click OK. The quotes make it a text result.
"Enter a first name before saving this contact."Save the field options and close Manage Database. You have changed a data rule, not just one layout. The same FirstName field uses the rule on Contact Entry and Contact Notes too.
Not empty is checked when you commit the record, not merely when you press Tab. Click unused layout space to attempt a commit. Correct the value if validation stops you.
2. Add a small, consistent vocabulary.
- Choose File → Manage → Value Lists. Create a list named Contact statuses.
- Choose custom values and enter Active and Inactive on separate lines. Save the list.
- In Manage Database, add ContactStatus to Contacts as a Text field. You now have nine Contacts fields: the original five default fields, three name/email fields, and this one.
- Open ContactStatus’s Validation tab. Keep Only during data entry, clear user override, and select Member of value list with Contact statuses.
- Leave Not empty off. We deliberately allow an unclassified contact. Do not add an auto-enter default.
- Set this custom message and save:
"Choose Active or Inactive, or leave the status blank."Adding rules does not repair old records or fill the new field. Decide each contact’s status deliberately. This lesson’s validation timing is for data entry; do not treat it as a complete import-cleaning process.
3. Give the new field a clear home.
- Choose File → Manage → Layouts. Select Contact Entry, duplicate it, and rename the copy Contact Details. Keep its table occurrence as Contacts.
- Open Contact Details in Layout mode. Remove the copied New Contact button from this duplicate only. The original Contact Entry layout and its button stay in place. For this lesson, use the toolbar’s New Record on Contact Details.
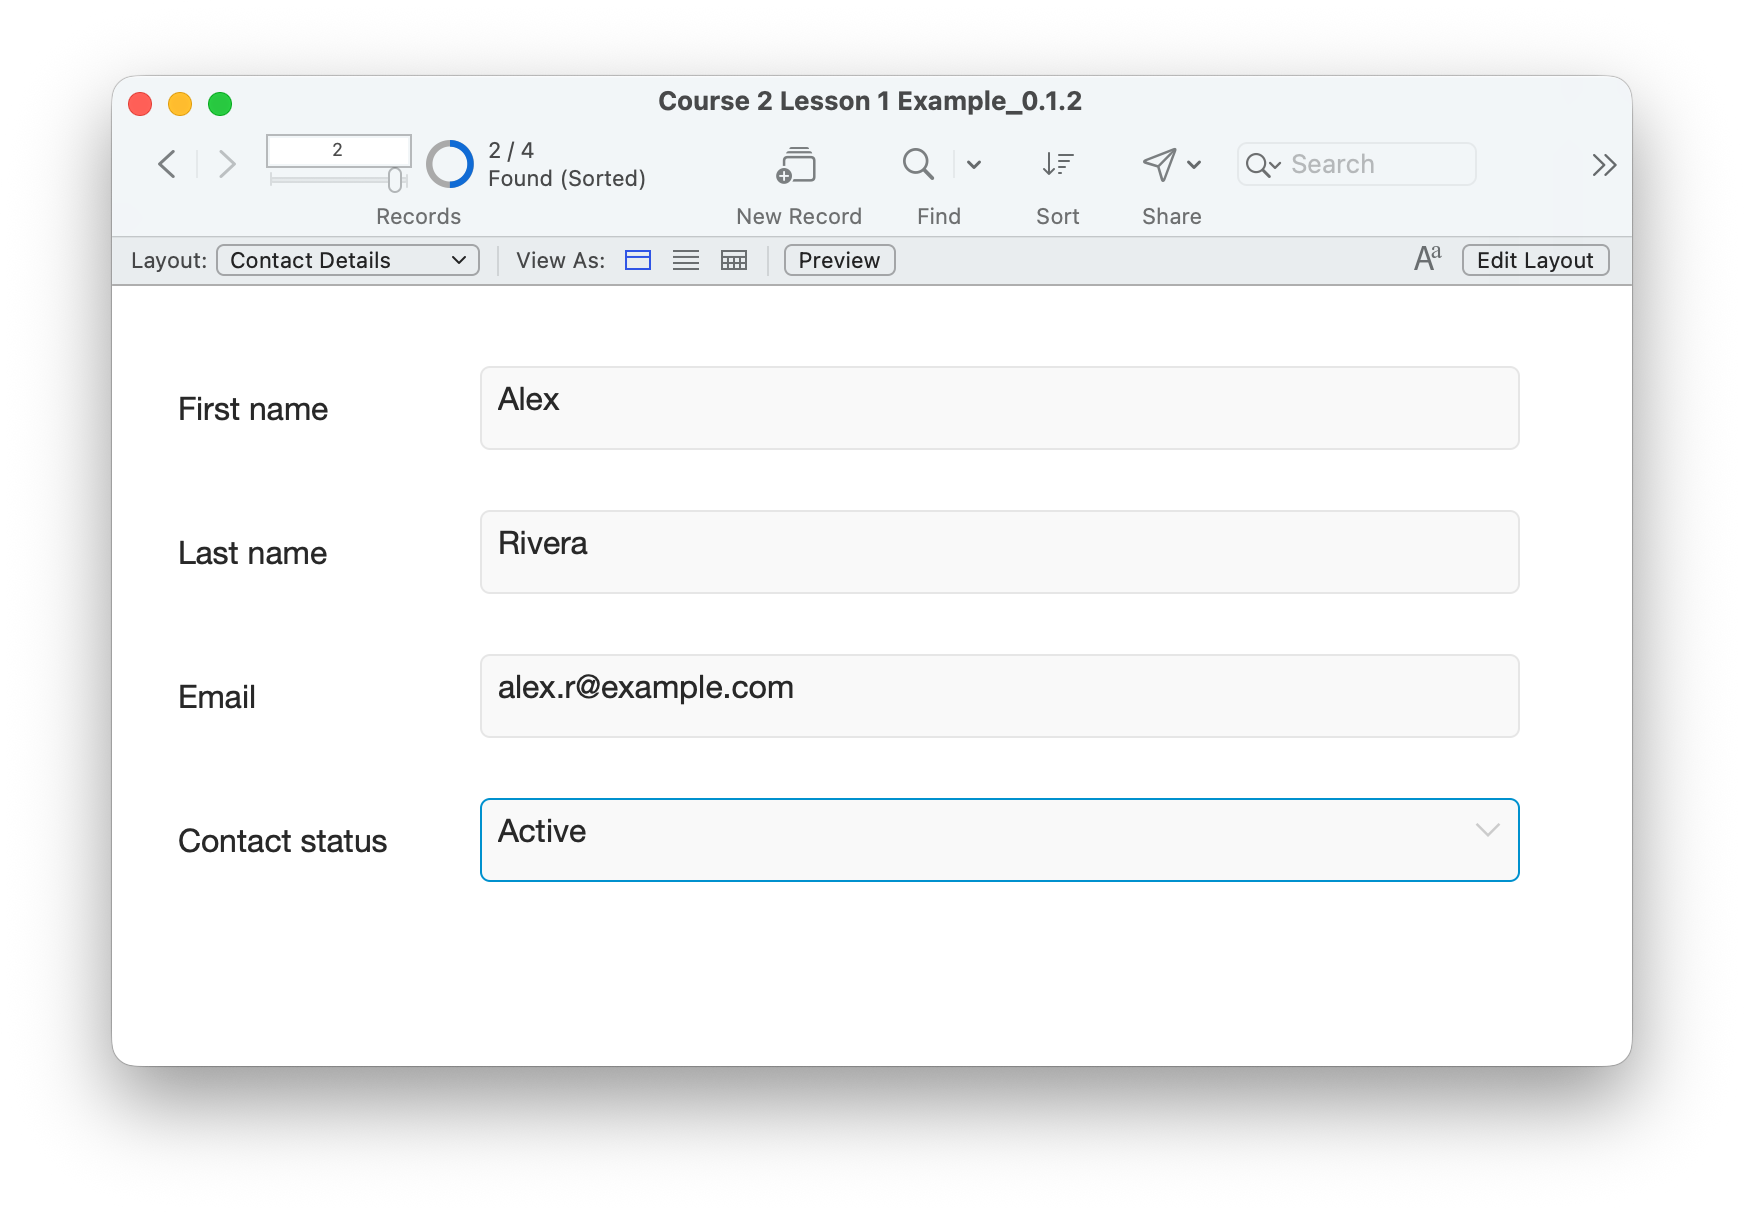
- Extend the Body part if necessary. Duplicate the Email label and field below the existing row. Change the label to Contact status and rebind the copied field to Contacts::ContactStatus.
- With the new field selected, open the Inspector’s Data tab. Set Control style → Pop-up Menu and Values from → Contact statuses. Leave options for other values and editing the list off.
- Align the new row with the other labels and fields. Use Layouts → Set Tab Order to set FirstName, LastName, Email, then ContactStatus.
- Return to Browse mode, save the layout, and choose Form View. Check that the full names and email addresses are readable.
The completed example uses this new layout while preserving the original layouts and their script references. You can switch back to Contact Notes to see the same contact’s notes.
Try it yourself.
Use a practice copy. Check both a valid entry and a deliberate mistake, then leave the file in a valid state.
- On Contact Details, show all records. Classify Alex Rivera as Active and Alex Morgan as Inactive. Commit each change and confirm that the other contact’s value stays separate.
- Use the toolbar’s New Record. Enter LastName Chen and Email morgan.chen@example.com, leaving FirstName blank. Click unused layout space. The first-name message should stop the commit. Return to the record and enter Morgan.
- Leave ContactStatus blank and commit. This should be allowed. Now choose Active, commit, move away and return to confirm it was saved.
- To check the field rule separately from the menu, duplicate Contact Details as Validation Practice. On that temporary layout, change only ContactStatus’s control style to Edit Box. Enter Busy for Morgan and exit the field. The status message should appear. Correct it to Active. Keep Contact Details as the finished menu-based layout.
- Close and reopen your working file. Confirm the statuses persist and your existing notes still belong to the correct contacts. The new Morgan record adds one contact; changing a status adds none.
Compare your result
FirstName cannot be empty at commit. Duplicate first names are allowed. ContactStatus offers Active and Inactive; blank is allowed, but Busy fails membership validation during data entry. The example download is a structural comparison file; it does not include Morgan or your completed test entries.
Check your understanding.
Choose one answer for every question. You can retry or reset; answers and scores stay in this page.
Next: give each contact a follow-up.
Lesson 2 adds a related FollowUps table for a task, a due date and completion status. Keep this working file for the next step.
Return to the course outline ↗