Use your latest working file.
Save and close your Lesson 4 file, make a backup, then open a working copy. Preserve the tasks you added or completed. Keep Contact Actions and its scripts; this lesson adds a separate overview.
The starting download is a saved Lesson 4 example with four tasks: Morgan’s Send project outline is Open; Rivera’s Send meeting summary, Confirm next meeting and Send the project scope document are Done. The completed example adds one summary field and Follow-up Overview. Neither download resets the tasks to the earlier Lesson 3 screenshot.
Your outcome
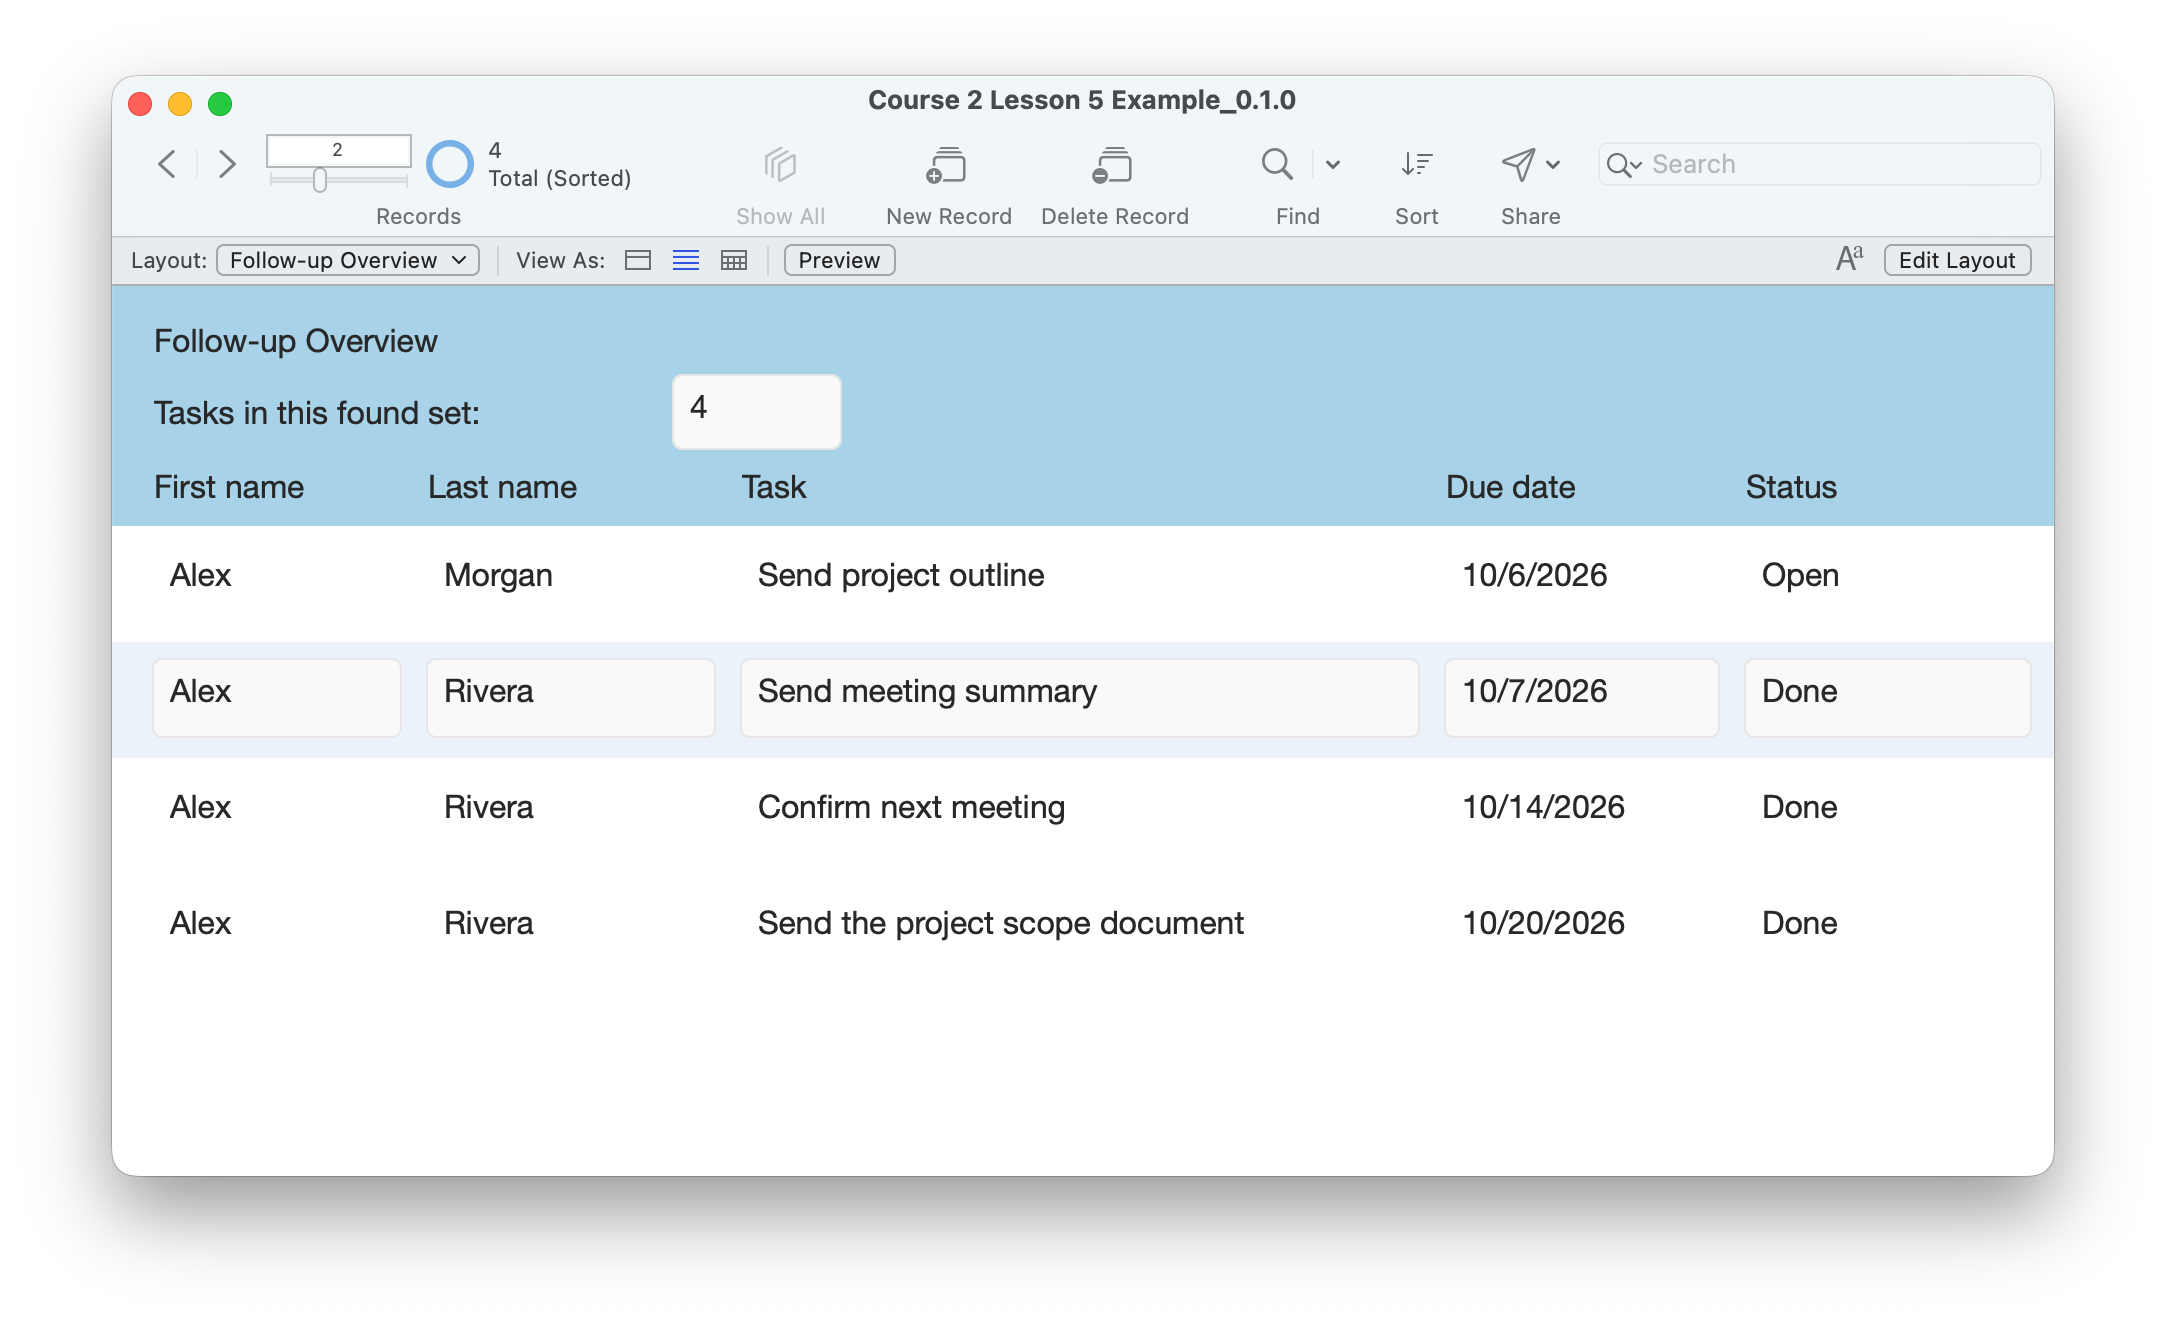
A List View layout based on FollowUps, with one task per row and a Header showing “Tasks in this found set.” Find Open or Done records and watch the count reflect those results.
1. Count a value every task has.
- Choose File → Manage → Database → Fields and select FollowUps.
- Create sTaskCount with type Summary. The initial “s” is our naming convention, not a special FileMaker command.
- In the summary options, select Count of and choose PrimaryKey from FollowUps. Leave Running count off. Summarize repetitions together.
- Save the definition. FollowUps now has ten fields: its nine existing fields and this summary.
Count counts nonempty values. Every task has a PrimaryKey, so counting that field counts tasks. Counting an optional field could miss records with empty values.
A Summary field is not a Number field you update manually. It recalculates for the current found set. It does not count Contacts, and it does not change the task records.
2. Give the list a Header and Body.
- Create a new layout/report named Follow-up Overview, showing records from FollowUps. Choose a Computer list layout. Include Task, DueDate, Status and the related Contacts::FirstName and Contacts::LastName fields.
- In Layout mode, use Layouts → Part Setup to ensure the layout has a Header above a Body. The Header appears above the list; the Body repeats for each task.
- In the Header, add the title Follow-up Overview, the label Tasks in this found set:, and the field FollowUps::sTaskCount beside it.
- Add column labels to the bottom of the Header: First name, Last name, Task, Due date and Status.
- Arrange the five data fields across one compact Body row beneath their labels. Give Task the most width. Display complete dates with four-digit years. Keep each field entirely inside the Body.
- Use Edit Boxes for the five data fields so you can enter find criteria. Set the Header count to display a whole number with no decimal places. It is a summary result, not an editable count.
- Save, return to Browse mode, and choose View → View as List. Show All Records. The count should match the total tasks shown in the toolbar.
Use List View for this layout. Form View shows one Body record at a time. Table View supplies its own columns and may omit the Header unless configured separately. Follow-up List remains available for the earlier table exercise.
Related names come from Contacts through the existing relationship. Use Contact Actions for creating and completing tasks. Avoid the toolbar’s New Record on the overview: it creates a task without selecting a parent contact.
3. Make the count’s meaning explicit.
- On Follow-up Overview, choose Show All Records. Note the summary count and the toolbar total.
- Enter Find mode, type Open in Status and perform the find. The Header now counts only matching tasks.
- Run a new find for Done. Compare that count with the completed tasks.
- Show All Records again. Confirm the full count returns.
Always name the measure accurately. “Tasks in this found set” remains true after any search. A fixed “Open tasks” label would be misleading after Show All Records or a Done find.
In these downloads, all tasks = four, Done = three and Open = one for Morgan. If you added more tasks or changed other statuses, count your actual matching rows instead. Do not alter data just to match these numbers.
If a find has no matches, FileMaker shows a no-records message. Review the criteria or cancel the find and show all records. An empty result does not mean your tasks were deleted; do not mistake a canceled find’s previous results for the attempted search.
4. Put the earliest dates first.
- Run the Open find. Choose Records → Sort Records.
- Add DueDate ascending, followed by Task ascending to order tasks with equal dates. Sort the found records.
- Read the earliest task, due date and contact together. Confirm the summary count did not change merely because you sorted.
- For a broader review, show all records and sort by Status ascending, then DueDate ascending and Task ascending. Notice that alphabetical status order places Done before Open.
Sorting by Status does not make an Open-only work list. Find Open first when unfinished work is your priority. A date by itself also does not tell you a task is overdue: combine an Open status with a due date before your reference date, as in Lesson 3.
Try it yourself.
- Record your All, Open and Done counts. If all tasks use these two statuses, Open plus Done should equal All.
- Confirm the Header count matches the toolbar’s found count and the visible task records. Scroll if needed; only part of a long list may fit onscreen.
- On Contact Actions, create a new task for Alex Morgan: Review project outline, a due date of tomorrow and Status Open. Commit it.
- Return to Follow-up Overview and run a fresh Open find. Expect one more Open task than before. Sort by DueDate and Task again.
- On Contact Actions, mark that new task Done. Return to the overview and rerun the Open find; then run the Done find. The task should move between these results while the total task count stays unchanged.
- Show all tasks, sort by DueDate then Task, close and reopen the file, and check the new task’s status and contact link. Verify the count again after repeating the find.
Compare your result
The list repeats one Body row per task. The Header summary follows the found set. Creating a task increases the total; completing it changes the Open/Done split without increasing the total. Sorting affects order, not membership or count. A search must be rerun to include records whose status changed elsewhere.
Check your understanding.
Choose one answer for every question. Answers and scores stay in this page.
Next: make the report portable.
Lesson 6 prepares a focused report for print or PDF. Keep the overview and your current tasks.
Return to the course outline ↗