Keep your completed Course 3 app.
Save and close your latest Course 3 file, make a backup, and continue in a copy named Course 4 Working.fmp12. Preserve your records and layout corrections. This course uses FileMaker Pro 26 on macOS; FileMaker Pro is sold separately.
The starting download contains Course 3 Lesson 6 Example 0.1.1. The completed example adds a Projects table, a relationship and Contact Projects layout. It begins with an empty Projects table so you can add the practice records below. Existing contacts, notes and tasks are preserved; your task statuses may differ from earlier screenshots.
Your outcome
Rivera and Morgan can each own a project called Website refresh. Their records stay separate because the relationship uses IDs.
1. Give a project its own record.
A project groups work for one contact. A contact may have many projects, but each project in this course belongs to one contact. ProjectName describes the work; PrimaryKey identifies the project; ContactID identifies its owner.
| Record | Unique identity | Link |
|---|---|---|
| Contact | Contacts::PrimaryKey | Parent of projects |
| Project | Projects::PrimaryKey | Projects::ContactID matches its contact |
Do not store several project names in one contact field or use a name as the key. Two records can share a readable name while remaining different projects. We will connect tasks in the next lesson; leave FollowUps unchanged now.
2. Create the Projects table.
- Choose File → Manage → Database → Tables. Create a table named Projects.
- On Fields, select Projects. Keep the five default fields: PrimaryKey, CreationTimestamp, CreatedBy, ModificationTimestamp and ModifiedBy. Keep PrimaryKey’s auto-enter UUID and protection against modification. Do not type sample keys or replace the auto-enter formula.
- Add ContactID as Text. Leave it editable with no auto-enter value, no global storage and no unique-value validation. Several projects may share the same ContactID.
- Add ProjectName as Text. In Options → Validation, enable Not empty and clear Allow user to override during data entry. Keep validation during data entry. Do not require unique project names.
With the standard five default fields, Projects now has seven fields. If your default-field configuration differs, compare the five system fields with the completed example before continuing. PrimaryKey is unique per project; ContactID is deliberately repeatable.
3. Match the contact key.
- On Relationships, locate Contacts and the new Projects table occurrence. Drag Contacts::PrimaryKey to Projects::ContactID.
- Open the relationship. Confirm Contacts::PrimaryKey = Projects::ContactID. Do not join the two PrimaryKey fields to each other.
- Under Projects only, enable Allow creation of records in this table via this relationship. Leave the equivalent option under Contacts off.
- Leave Delete related records off on both sides. Keep relationship sorting off for this exercise. Save the database definition.
The portal will create a project and fill its ContactID from the current contact’s key. It also receives its own auto-enter PrimaryKey. There is no need to display or manually copy either key during entry.
4. Make a contact-based entry screen.
- Duplicate the existing Contact Notes layout and name the copy Contact Projects. In Layout Setup, keep Show records from: Contacts. Keep the original Contact Notes layout.
- Keep First name, Last name and Email at the top. Change the notes heading to Projects — type in the next blank row.
- Open Portal Setup on the copied portal. Change Show records from to Projects. Use three rows starting at row 1. Keep a vertical scroll bar available, no portal filter, no portal sort and no portal-row deletion option.
- Rebind the field inside the first portal row from Notes::NoteText to Projects::ProjectName. Name the portal Projects portal and the field object ProjectName. Keep the field fully inside that first row and make sure text fits.
- Save and return to Browse mode, Form View. Use the Layout menu to open Contact Projects. The new layout has no navigation scripts in this lesson; the Layout menu also returns you to your earlier screens.
New Record still means new contact.
This layout is based on Contacts, so the toolbar counts contacts and its New Record button creates a contact. To add a project, type in the next blank portal row, then commit by clicking outside the fields.
If there is no blank row, first confirm the layout uses Contacts, the portal uses Projects and related creation is enabled on Projects. A saved contact needs its existing PrimaryKey. Do not repair a link by editing that key.
Give the two Alex contacts different projects.
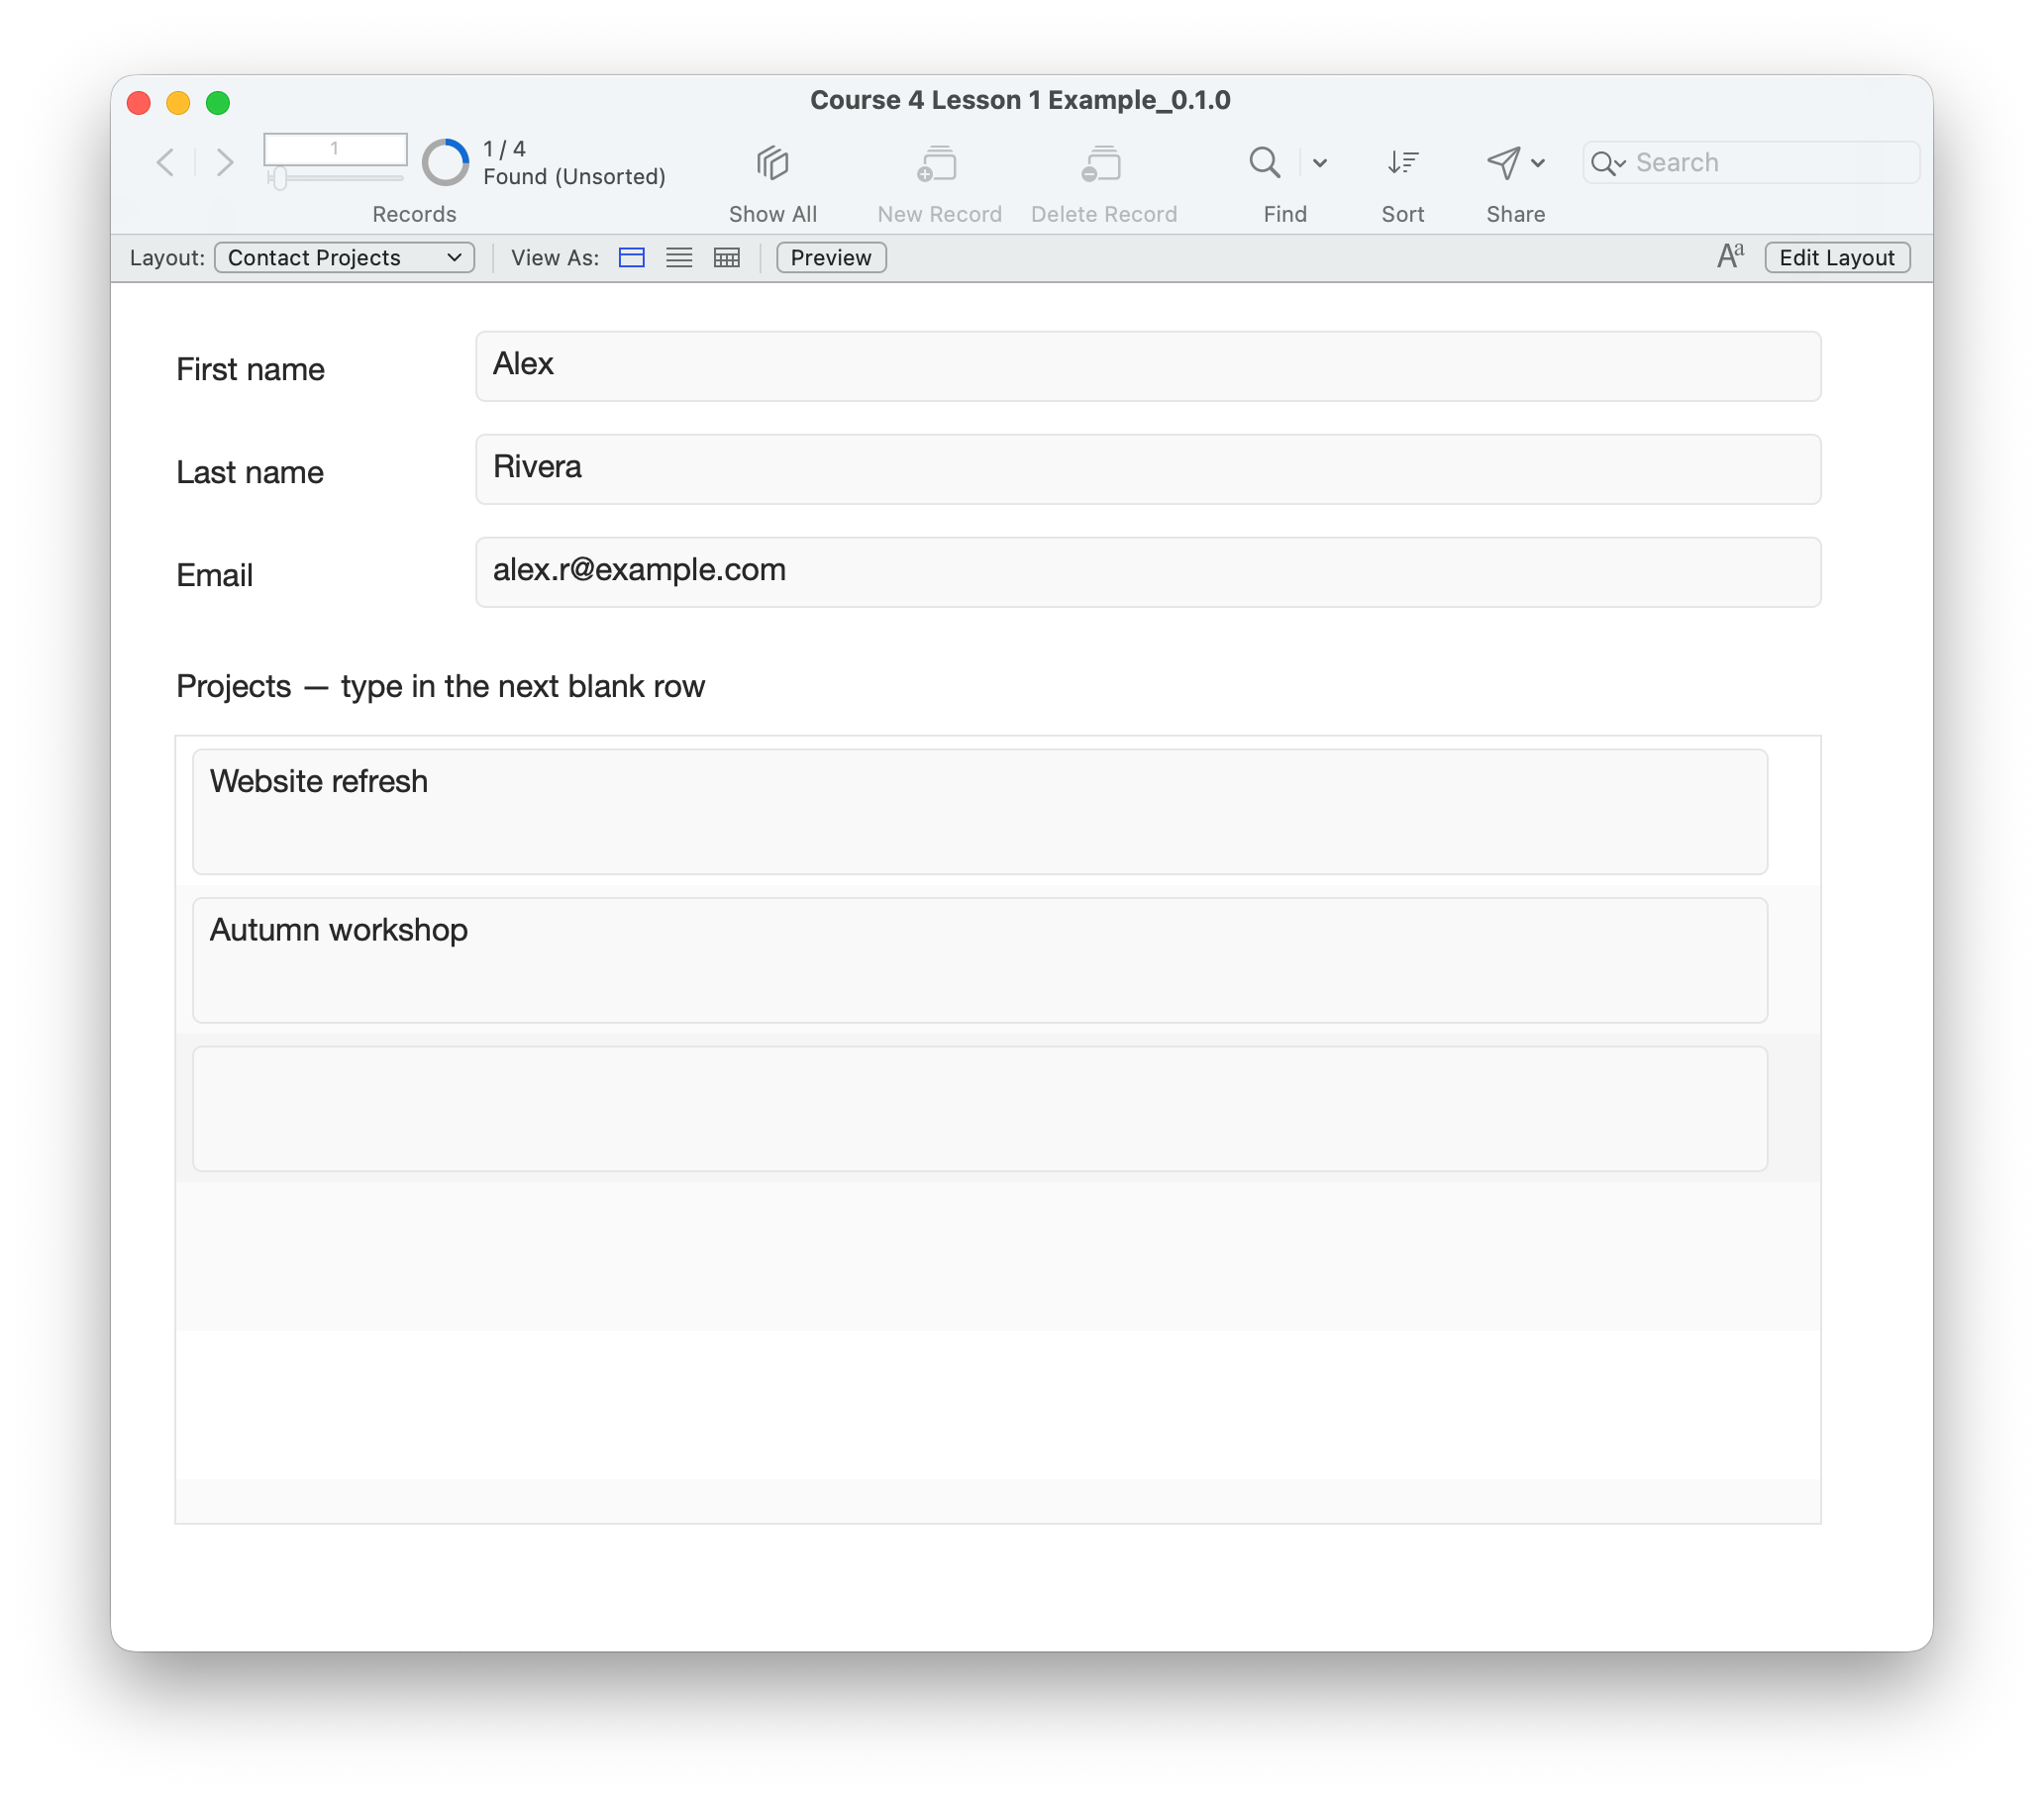
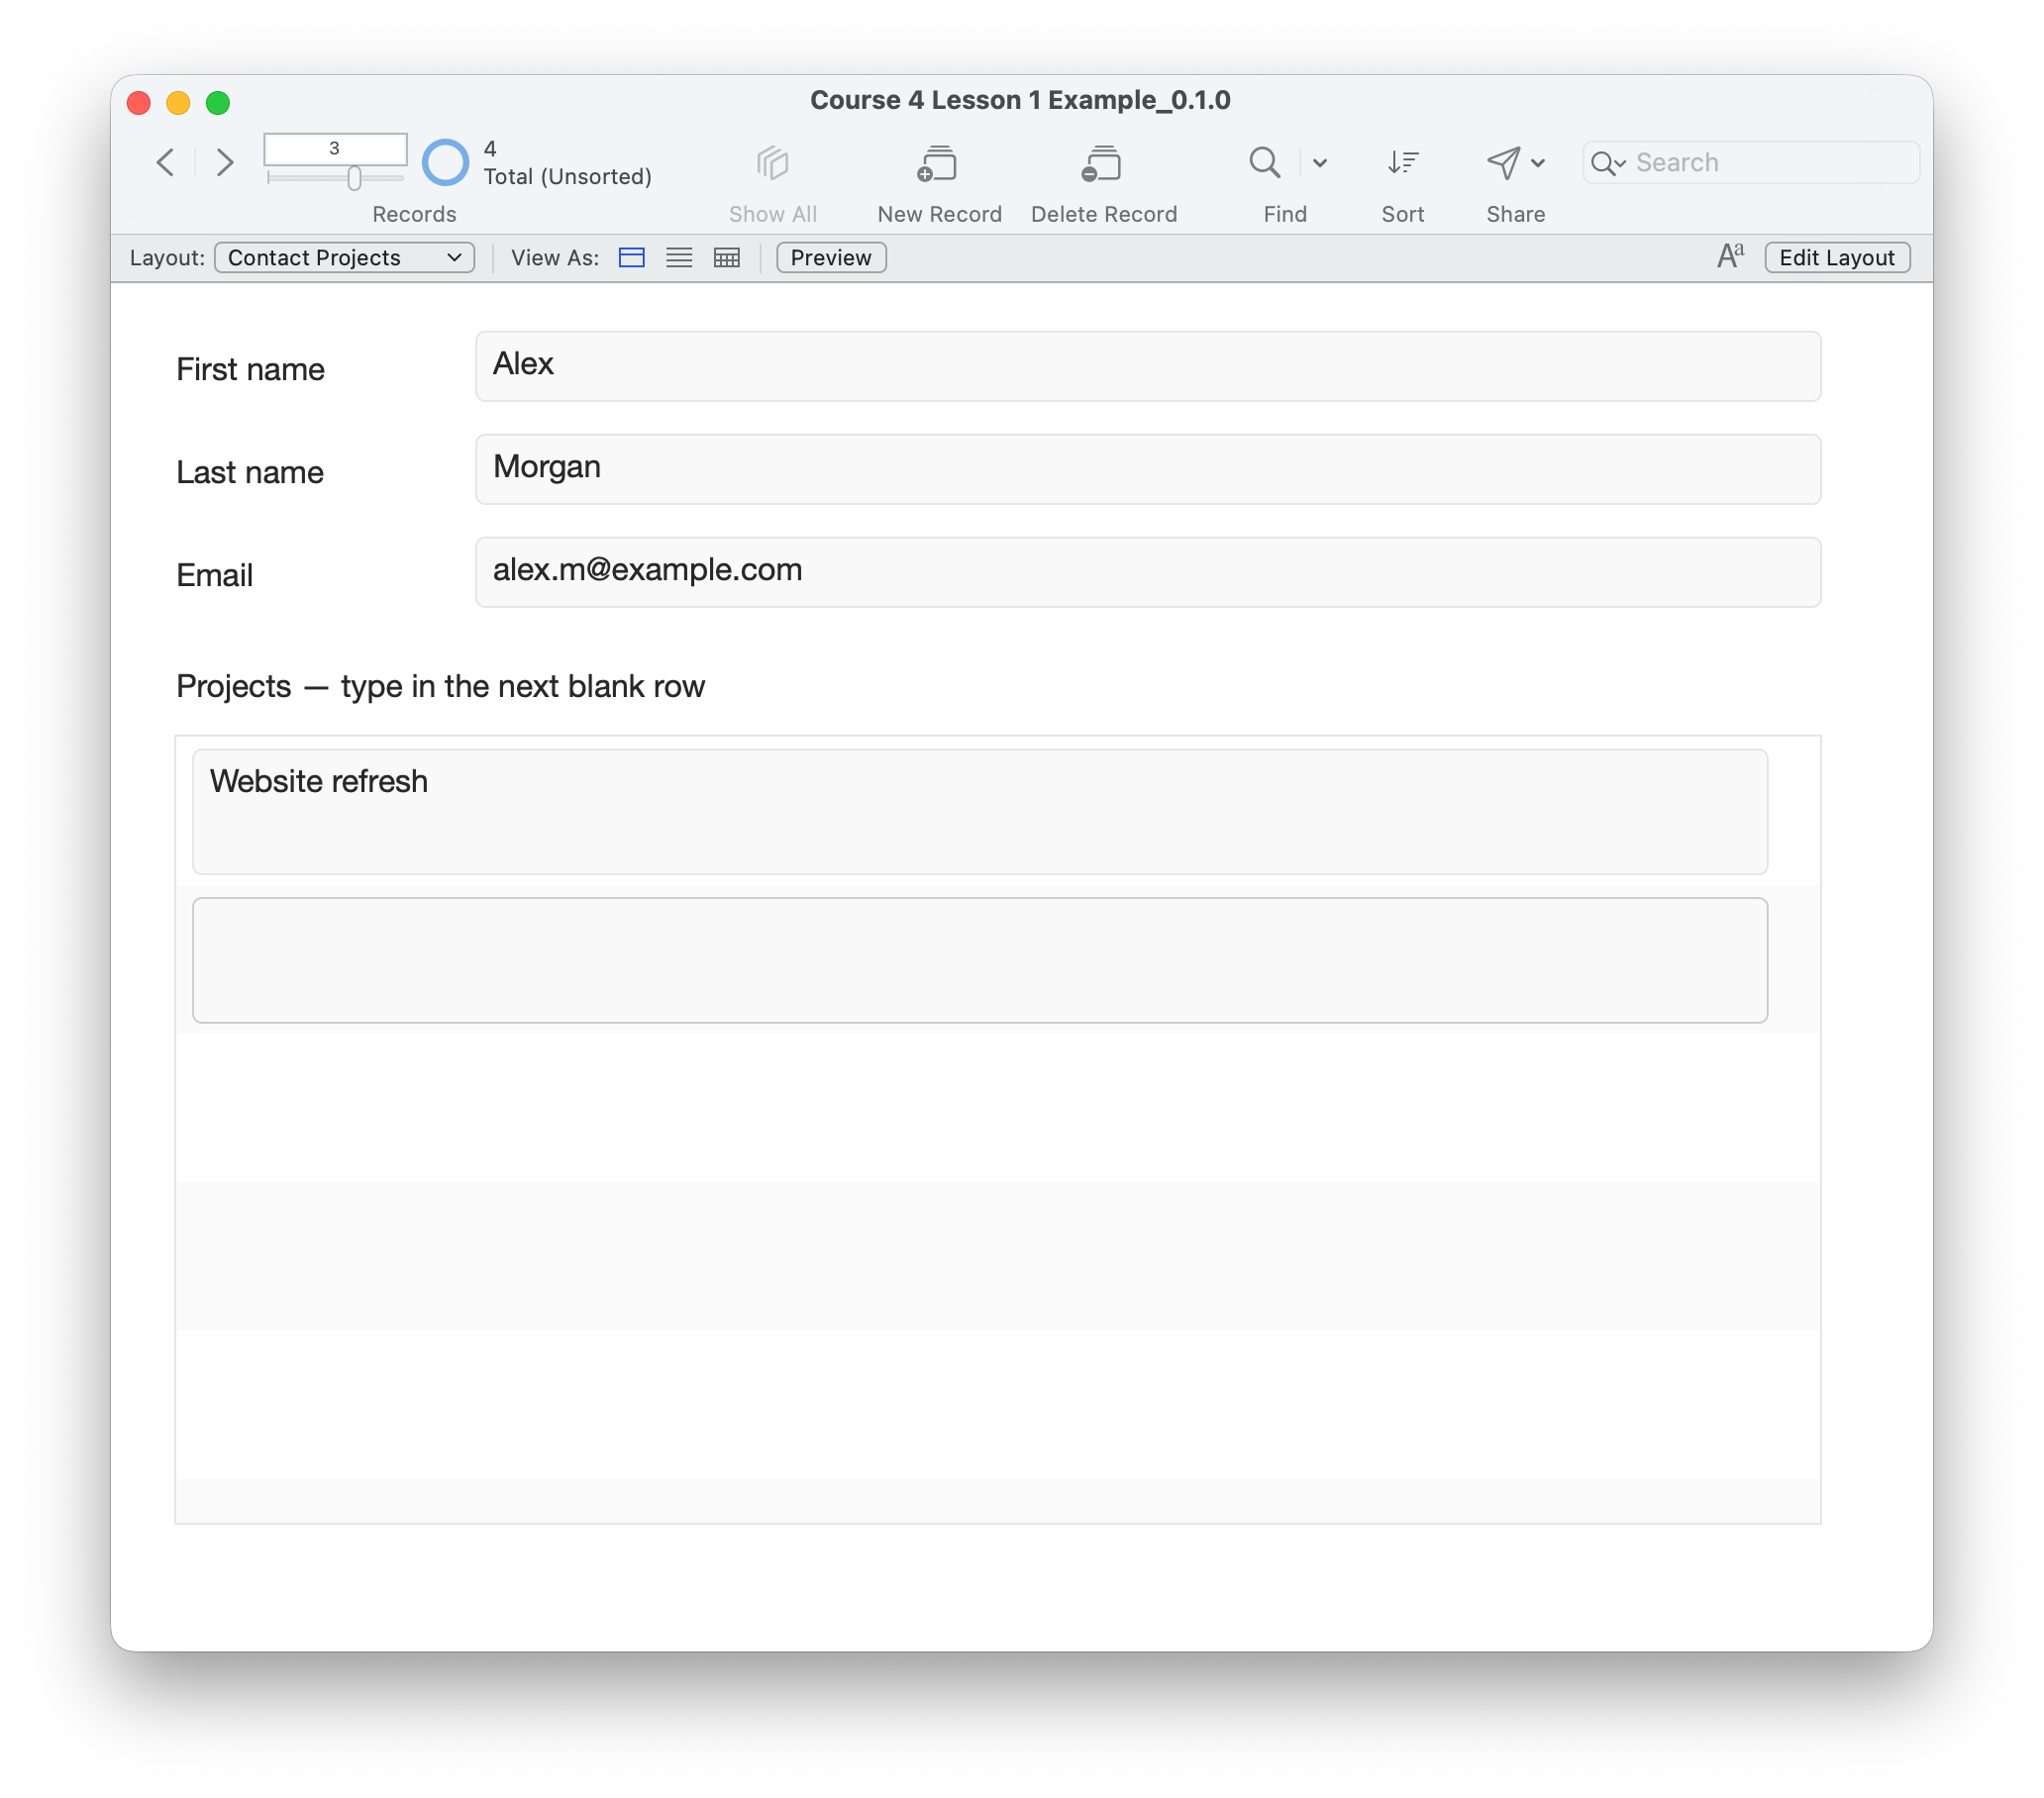
- Use a disposable working copy. Open Contact Projects in Browse mode, Form View. If only one contact is found, use Show All. Find Alex Rivera by last name or email, not first name alone. Note the Contacts record count.
- In the portal’s blank row, enter Website refresh. Click outside the fields to commit. Enter Autumn workshop in the next blank row and commit.
- Switch to Alex Morgan. Rivera’s projects should not appear. Create another project named Website refresh for Morgan. The repeated name is intentional: it must remain a separate project.
- Switch between Rivera and Morgan. Expect two projects for Rivera and one for Morgan. The contact count must not increase. The blank portal row is an entry space, not an additional saved project.
- On a disposable copy, clear an existing project’s name and try to commit. Expect required-value validation. Restore its name and commit; do not override validation.
- Open Contact Task Views, Follow-up Overview and Follow-up Report using the Layout menu. Check that existing tasks, statuses, navigation and report return still work. No task has been assigned to a project yet.
- Save and close the file. Reopen Contact Projects and verify the two contact-specific project lists persist. Keep this saved working file for Lesson 2.
Compare your result
Rivera has Website refresh and Autumn workshop. Morgan has a separate Website refresh. Switching contacts changes the project list, while the contact count and all previous tasks remain intact. The projects remain after closing and reopening.
Check your understanding.
Choose one answer for every question. Answers and scores stay in this page.
Next: connect tasks to projects.
Lesson 2 adds an optional task-to-project link while preserving existing contact relationships and unassigned tasks. Keep your completed Course 4 working file.
Continue to Lesson 2 ↗