Keep your completed project.
Save and close your Course 2 working file. Make a backup and continue in a copy named Course 3 Working.fmp12. Preserve your own contacts, notes and task statuses.
The starting download preserves the latest Course 2 Lesson 6 file. The example adds six navigation scripts and a row of buttons to Contact Actions and Follow-up Overview. Version 0.1.1 also adds Back to Tasks in the report’s Top Navigation part. The schema, existing task scripts and printable report contents are preserved. Downloads are structural examples; your practice records may differ.
Your outcome
From either working screen, open Contacts, Tasks or Report. An invalid current entry stops navigation with a message instead of being silently discarded.
1. Map labels to layouts.
| Button | Destination | Base table and view |
|---|---|---|
| Contacts | Contact Actions | Contacts · Form View |
| Tasks | Follow-up Overview | FollowUps · List View |
| Report | Follow-up Report | FollowUps · List View, then Preview when needed |
Choose each layout once and set its intended view. The scripts below do not force a view, perform a find or sort, or select a task’s parent contact. They open the destination in its current view. If you later change that view, restore Form or List using the View menu.
Contact Actions counts contacts even though it contains task rows. The overview and report count tasks in Browse mode. In Preview, navigation counts pages. Moving between the overview and report uses the same FollowUps table occurrence; keep track of the found set you selected.
Screen navigation is not record navigation.
Contacts opens the contact screen. It does not promise to select the contact belonging to the task you just viewed. A later lesson adds an explicit related-contact action.
2. Check entry before leaving.
In Script Workspace, create Navigation UI and Navigation Controller folders. Keep the new scripts out of the Scripts menu. Follow the same empty-string/message return convention as Course 2.
Create Navigation | Open Contacts in the Controller folder. Add each step individually. For Go to Layout, select Layout → Contact Actions directly. Do not use Layout Name by calculation. Keep “Skip data entry validation” off in Commit Records/Requests.
FileMaker script
Commit Records/Requests [ With dialog: Off ; Skip data entry validation: Off ]
Go to Layout [ "Contact Actions" ; Animation: None ]
This is an incomplete reading guide to the successful path. Use the complete controller below, including its guards and error checks, before binding the button.
Complete Contacts controller with safeguards
FileMaker script
# PURPOSE: Save the current entry and open Contact Actions without changing the found set.
# HISTORY: 2026-OCT-07    Plato    Create Course 3 Lesson 1 navigation.
If [ Get ( WindowMode ) ≠ 0 ]
    Exit Script [ "Return to Browse mode before using navigation." ]
End If
Commit Records/Requests [ With dialog: Off ; Skip data entry validation: Off ]
If [ Get ( LastError ) ≠ 0 ]
    Exit Script [ "Finish or correct the current entry before switching screens." ]
End If
Go to Layout [ "Contact Actions" ; Animation: None ]
If [ Get ( LastError ) ≠ 0 ]
    Exit Script [ "The destination layout could not be opened." ]
End If
Exit Script [ "" ]
The mode check prevents the script from treating a Find request as ordinary entry. Commit attempts to save the current record and related changes; the immediate error check stops navigation when correction is needed. Nothing in this script reverts an edit or bypasses validation.
Create Navigation | Contacts Button Pressed in the UI folder. Choose the controller directly in Perform Script. Configure Show Custom Dialog with one OK button, no input fields and commit data off.
Complete Contacts UI script
FileMaker script
# PURPOSE: Open Contacts and show any returned message.
# HISTORY: 2026-OCT-07    Plato    Create Course 3 Lesson 1 navigation.
Set Error Capture [ On ]
Allow User Abort [ Off ]
Perform Script [ "Navigation | Open Contacts" ]
If [ Get ( ScriptResult ) ≠ "" ]
    Show Custom Dialog [ "Navigation" ; Get ( ScriptResult ) ]
End If
The UI script turns error capture on and displays a message returned by the controller. These are reading guides for configuring native steps, not complete scripts you can paste as plain text.
Add the other two destinations.
Duplicate the controller/UI pair for Tasks and Report. Update the names, purpose/history comments, direct layout selection and Perform Script target. Keep the same validation checks. All button script parameters remain empty.
Tasks: complete controller and UI listings
FileMaker script
# PURPOSE: Save the current entry and open Follow-up Overview without changing the found set.
# HISTORY: 2026-OCT-07    Plato    Create Course 3 Lesson 1 navigation.
If [ Get ( WindowMode ) ≠ 0 ]
    Exit Script [ "Return to Browse mode before using navigation." ]
End If
Commit Records/Requests [ With dialog: Off ; Skip data entry validation: Off ]
If [ Get ( LastError ) ≠ 0 ]
    Exit Script [ "Finish or correct the current entry before switching screens." ]
End If
Go to Layout [ "Follow-up Overview" ; Animation: None ]
If [ Get ( LastError ) ≠ 0 ]
    Exit Script [ "The destination layout could not be opened." ]
End If
Exit Script [ "" ]
FileMaker script
# PURPOSE: Open Tasks and show any returned message.
# HISTORY: 2026-OCT-07    Plato    Create Course 3 Lesson 1 navigation.
Set Error Capture [ On ]
Allow User Abort [ Off ]
Perform Script [ "Navigation | Open Tasks" ]
If [ Get ( ScriptResult ) ≠ "" ]
    Show Custom Dialog [ "Navigation" ; Get ( ScriptResult ) ]
End If
Report: complete controller and UI listings
FileMaker script
# PURPOSE: Save the current entry and open Follow-up Report without changing the found set.
# HISTORY: 2026-OCT-07    Plato    Create Course 3 Lesson 1 navigation.
If [ Get ( WindowMode ) ≠ 0 ]
    Exit Script [ "Return to Browse mode before using navigation." ]
End If
Commit Records/Requests [ With dialog: Off ; Skip data entry validation: Off ]
If [ Get ( LastError ) ≠ 0 ]
    Exit Script [ "Finish or correct the current entry before switching screens." ]
End If
Go to Layout [ "Follow-up Report" ; Animation: None ]
If [ Get ( LastError ) ≠ 0 ]
    Exit Script [ "The destination layout could not be opened." ]
End If
Exit Script [ "" ]
FileMaker script
# PURPOSE: Open Report and show any returned message.
# HISTORY: 2026-OCT-07    Plato    Create Course 3 Lesson 1 navigation.
Set Error Capture [ On ]
Allow User Abort [ Off ]
Perform Script [ "Navigation | Open Report" ]
If [ Get ( ScriptResult ) ≠ "" ]
    Show Custom Dialog [ "Navigation" ; Get ( ScriptResult ) ]
End If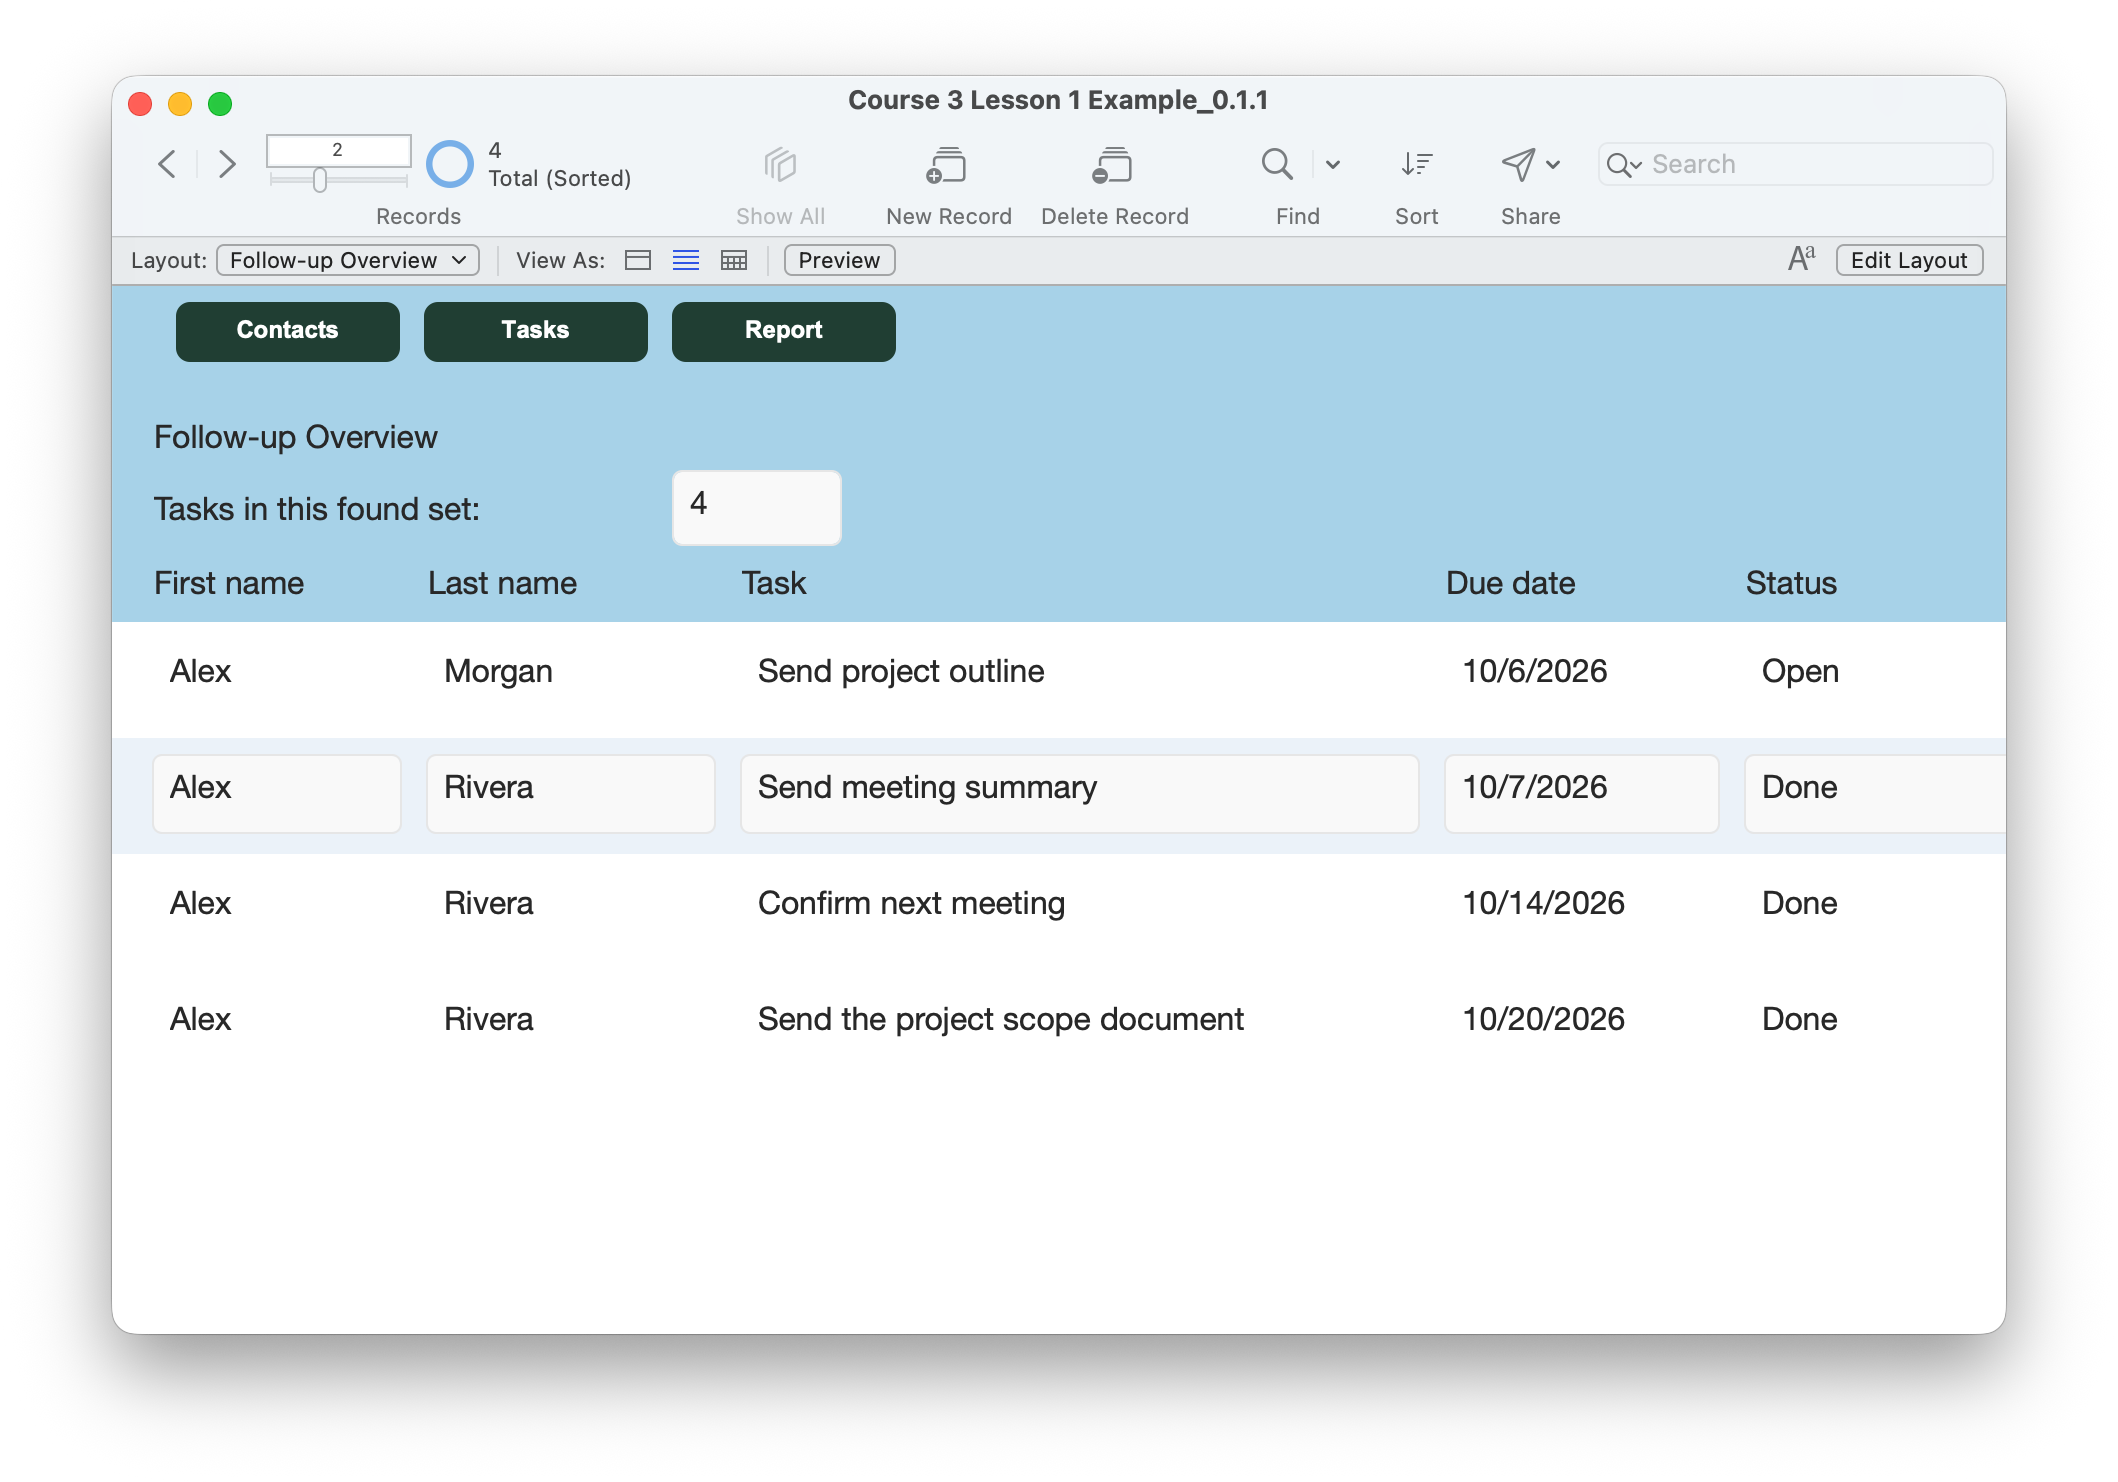
Try every route, including a failed save.
- On Contact Actions in Browse mode, click Tasks. Confirm Follow-up Overview opens. Click Contacts to return. Try the destination you are already on; it should not create a record.
- Click Report from each working screen. Confirm Follow-up Report opens without creating a PDF or changing tasks. Preview it and check that navigation buttons are absent. Exit Preview and click Back to Tasks. Confirm Follow-up Overview opens.
- On the overview, find Open manually and note the found count. Click Report. Confirm it shows the same selected tasks and matching summary. Show All Records afterward if you want the full report.
- In a practice copy, clear an existing task’s required Task text on Contact Actions, then click Tasks. Expect validation or a navigation message and no layout change. Restore the description and commit it; navigation should work again.
- Check the existing New follow-up and Mark done controls still work on the intended contact and portal row. Verify the contact toolbar count and task count describe different things.
- Save, close and reopen the file. Confirm the buttons, prior tasks and statuses remain. Navigation alone must not increase record counts.
Compare your result
Contacts opens Contact Actions; Tasks opens Follow-up Overview; Report opens Follow-up Report. The valid-entry check happens before changing layouts. A failed commit keeps you on the current screen. No search, sort, task creation, completion or related-contact selection is hidden inside these navigation scripts.
Check your understanding.
Choose one answer for every question. Answers and scores stay in this page.
Next: find Open work with one click.
Continue to Lesson 2 to add search buttons, sorting and a clear no-matches response. Keep your working file and current records.
Return to the course outline ↗