Use a small dataset with deliberate awkward cases
A layout filled with three neat records can hide problems. Long names, blank email addresses and projects with several tasks expose different issues. Related sample data also lets you check whether your portal follows the current parent rather than showing every task.
This generator creates contacts, projects and tasks—not a finished FileMaker database. You will define three tables in a disposable practice file, import separate CSV files and connect their IDs. Use FileMaker Pro on your intended platform; the browser tool itself runs without FileMaker.
1. Generate a repeatable fixture
- Set contacts to 4, projects to 6 and tasks to 12.
- Use seed
article-practiceand reference date2026-10-01. This is a fixed exercise date, not today’s date. - Leave edge cases enabled and generate. Keep these settings together; changing the counts can change subsequent random choices.
- Select each table in turn and download its CSV. Also download the JSON bundle and Read Me so you can reproduce the fixture.
The reference date positions generated dates; it does not freeze FileMaker’s current date. A task that was “yesterday” relative to this fixture may be much older when you run the exercise. Compare against the fixed date when checking the fixture, then separately test a live overdue calculation.
2. Define fields that preserve the data
| Table | Text fields | Other fields |
|---|---|---|
| Contacts | ContactID, FullName, Email, PostalCode | — |
| Projects | ProjectID, ContactID, ProjectName | Budget: Number; StartDate: Date |
| Tasks | TaskID, ProjectID, TaskName, Status | DueDate: Date; Hours: Number |
Create one layout based on each table. Store IDs and postal codes as text: 00123 is a code, not the number 123. In this exercise, preserve the supplied IDs instead of replacing them with newly generated IDs. This is a practice import design, not a recommendation to disable production identity rules.
CSV dates are written as year-month-day. Verify how your FileMaker import interprets them. If a date becomes invalid or ambiguous, import that column into a temporary text field and convert it explicitly after checking year, month and day; do not assume a successful import means the dates are correct.
3. Import parents before children
- On the Contacts layout, choose File → Import Records → File and select the contacts CSV. Use Add new records. Match the header names to fields and treat the first row as field names, not data.
- Review import options, including auto-enter behavior. Keep the supplied IDs unchanged in this practice file. Confirm four contact records.
- Repeat from the Projects layout using its CSV; confirm six records.
- Repeat from the Tasks layout; confirm twelve records. Inspect a date and a decimal Hours value before continuing.
FileMaker supports several import actions, including updates; this exercise uses additions only. Follow the Claris import guidance and inspect the mapping every time. Importing the same fixture twice adds duplicates. Start again from an empty practice copy if you need to repeat it.
4. Connect the matching IDs
Contacts::ContactID = Projects::ContactID
Projects::ProjectID = Tasks::ProjectID
In Manage Database → Relationships, connect the matching fields in the relevant table occurrences. Keep these two relationships simple. Do not enable cascading deletes or related-record creation just to view the fixture.
- Add a Projects portal to the Contacts layout. Include ProjectID and ProjectName. Move between contacts and inspect which rows appear.
- Add a Tasks portal to the Projects layout. Include TaskID, ProjectID and TaskName.
- Choose one project ID from the CSV and count its tasks there. The portal for that project should show those same task IDs.
The generator assigns parents randomly. It does not guarantee every contact has a project or every project has a task. A blank portal can be correct. Verify the source rows before changing the relationship.
5. Use the edge cases as a test checklist
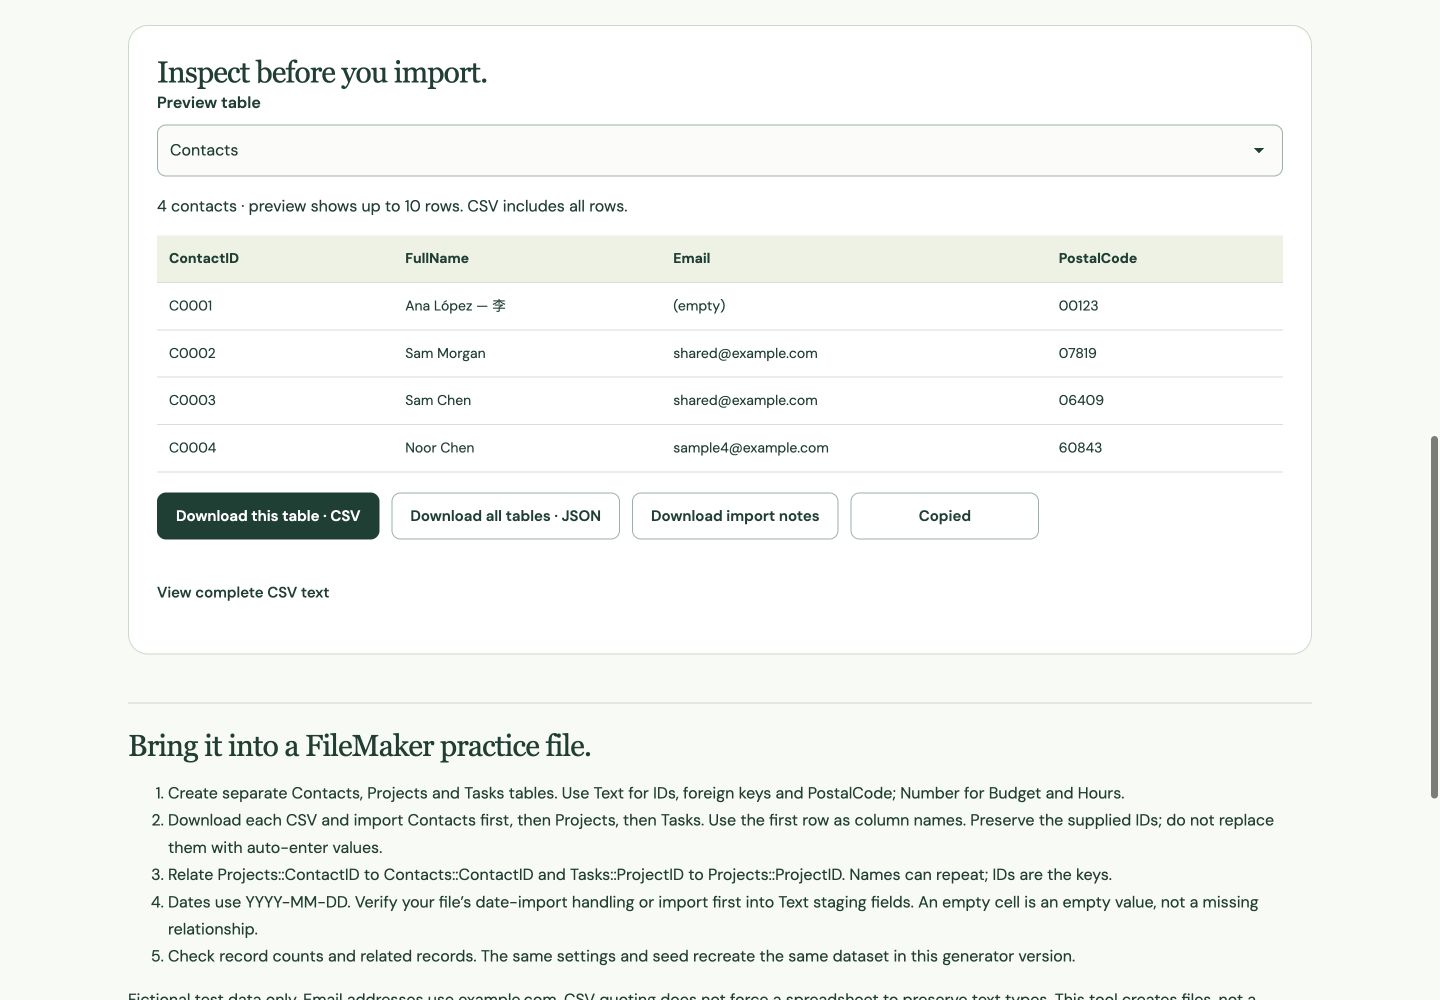
- Contact C0001 has a Unicode name, an empty email and postal code 00123. Check encoding, empty-state presentation and leading zeros.
- Contacts C0002 and C0003 share an email. Do not use email as the unique relationship key.
- Project P0001 has a long name. Inspect narrow layouts and printed output for clipping.
- Task T0001 is Open with zero hours and a due date one day before the reference date. Zero hours must remain zero.
- Task T0002 is Done with the same relative overdue date. A status-aware overdue rule should treat it differently from the open task.
- Task T0003 has a blank due date. It should not accidentally become an overdue task just because the date is absent.
Keep a useful baseline
Save the three counts, a few parent-child ID pairs, and the edge-case observations. Close and reopen the practice file, then revisit the same project and its tasks. This checks persistence and context as well as initial display.
A clean sample import does not validate a production migration. Real files may have validation, auto-enter calculations, triggers and account restrictions. Use this fixture to isolate layout and relationship behavior before adding those concerns.
References
Use a practice copy and verify the result in your FileMaker version. Browser screenshots demonstrate the tool; they do not establish native FileMaker testing.